Showing posts with label Dessert. Show all posts

Thursday, March 19, 2009

Oooo La La!

For years I have been obsessed with the way they look. They are colorful and perfect and come from fancy bakeries and call places like Paris home. And it's said that they are almost impossible to make right in your own kitchen which makes them even more sexy to me.

They are French Macaroons.

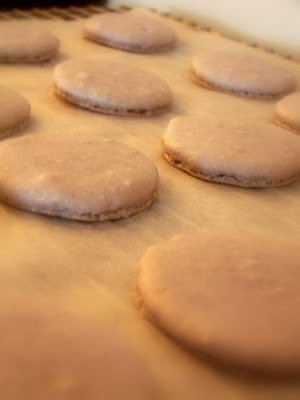
These sandwich cookies are made of egg whites and almond powder and are crispy on the outside and extraordinarily chewy on the inside. These days flavors range from chocolate & raspberry to pistachio, fig and lemon. Their signature is the "foot" that forms under each cookie while in the oven. Without this foot, macaroons just don't look like macaroons.

Before today I've never attempted to make them in my own kitchen. Everyone I've ever talked to threw their hand in the air and scoffed when talking about their first experience with these delightful cookies making me shy away from trying my own hand at them. For over a year I have been reading and researching different techniques and finally decided to see what all the fuss is about.

I am in love.

The recipe I tried was one for Raspberry & Chocolate Macaroons. Below you fill find the recipe (courtesy Epicurious.com) and the tips that I applied to said recipe. My macaroons came out just the way they should have-crispy, chewy and yes, they had feet. And soon, they will be gone.

Things to know before starting:
1. Use room temperature egg whites. Once they are room temperature, microwave them in a glass bowl for 10 seconds.

2. Use a template to draw circles on the parchment paper so that each cookie is the same size.


3. I allowed the cookies to air dry for 45 minutes prior to baking to form a crust.

4. The cookies that came out the best were the ones that I did not allow to crack like it says in the recipe. Total cooking time was about 14 minutes.

5. Once the cookies are out of the oven, place them (parchment paper and all) on a slightly damp cloth. This will help them come off the parchment easier. Peel them off and cool completely.

Raspberry Chocolate French Macaroons
For macaroons
6 oz sliced blanched almonds (not slivered; 2 cups)
1 1/2 cups confectioners sugar
3 large egg whites
3/4 teaspoon salt
3 tablespoons granulated sugar
Red or pink food coloring

For chocolate raspberry ganache
3 oz fine-quality bittersweet chocolate (60 to 64% cacao), finely chopped
1/3 cup heavy cream
1 tablespoon unsalted butter, softened
1/16 teaspoon raspberry extract (preferably McCormick brand)

Special equipment: parchment paper; a gallon-size sealable plastic bag (not pleated)

Make macaroons:
Line 2 baking sheets with parchment paper.

Pulse almonds with 1/2 cup confectioners sugar in a food processor until very finely ground, 2 to 3 minutes, then transfer to a bowl. Sift in remaining cup confectioners sugar, stirring to combine.

Beat egg whites with salt in another bowl with an electric mixer at medium speed until they just hold soft peaks. Add granulated sugar, a little at a time, beating, then increase speed to high and continue to beat until whites just hold stiff, glossy peaks. Add drops of food coloring to reach desired shade and mix at low speed until evenly combined. Stir almond mixture into meringue with a rubber spatula until completely incorporated. (Meringue will deflate.)

Spoon batter into bag, pressing out excess air, and snip off 1 corner of plastic bag to create a 1/4-inch opening. Twist bag firmly just above batter, then pipe peaked mounds of batter (the size of a chocolate kiss) onto lined sheets about 1 1/2 inches apart. Let cookies stand, uncovered, at room temperature until tops are no longer sticky and a light crust forms, 20 to 30 minutes.


Meanwhile, put oven racks in upper and lower thirds of oven and preheat oven to 300°F.

Bake cookies, switching position of sheets halfway through baking, until crisp and edges are just slightly darker, 20 to 25 minutes. Cool completely on sheets on racks, about 30 minutes.


Make ganache while macaroons bake:
Melt chocolate with cream in a metal bowl set over a pan of barely simmering water or in top of a double boiler, stirring until smooth. (Bowl should not touch water.) Remove bowl from heat, then add butter and raspberry extract, stirring until butter is melted. Let stand at room temperature until cooled completely and slightly thickened.

Assemble cookies:
Carefully peel cookies from parchment (they will be fragile). Sandwich a thin layer of ganache (about 1/2 teaspoon) between flat sides of cookies.

Filled macaroons keep in an airtight container at room temperature 3 days.

Saturday, November 1, 2008

Return of the Reese's

It starts around the second week in October and easily lingers into November. It shows up in cute miniature versions of our classic favorites, taunting us with its cuteness and the promise of fewer calories per serving.

Its Halloween candy and by today, many of us are sick of seeing it.

This year, instead of forcing your friends and family (or anyone else you encounter) to eat yet another peanut butter cup (OK, this might be a stretch. Who can't force those babies down?) why not get creative with your leftovers? Chop up a few candy bars and make them into a brownie like dessert.

Ingredients:

1 (16-oz.) package peanut-shaped peanut butter sandwich cookies, crushed

1/2 C. Butter, melted

1 Can Sweetened Condensed Milk

1/2 C. Creamy Peanut Butter

1 T. Vanilla

4 Peanut Butter Cups, coarsely chopped

2 Butterfinger bars, coarsely chopped

1 C. Semisweet Chocolate Chips

1/2 C. Honey-roasted Peanuts

Method:

1. In a medium bowl, combine cookie and butter. Press crumb mixture into bottom of a greased 13" x 9" pan (to form a crust) and bake at 350° for 6 to 8 minutes.

2. Mix the condensed milk, peanut butter, and vanilla in a medium bowl, until smooth.

3. Sprinkle chopped candy bars, chocolate chips and peanuts over the crust and pour the condensed milk mixture over it.

4. Bake at 350° for 25-28 minutes or until lightly browned. Remove to a wire rack, and let cool in pan and then cut into bars.

Saturday, October 25, 2008

Getting Figgy With It


Like most people my age, the word "Fig" usually congers up childhood memories of a soft square cookie which came in stacks and was given out liberally at snack time. But fresh figs are nothing like the overly sweet, sticky figs we remember. In fact, fresh figs are quite delicate and can be used not only for dessert, but also for hors d'oeuvres. This fast, simple recipe can be either, and can be served hot or room temperature.

Ingredients:
4 Ripe Black Figs
1/4 C. Honey
1-2 T. Soft Goat Cheese

Method:
1. Using a paring knife, slice off the tops of each fig. Next, make a cross on each to, gently opening it up to reveal the inside.

2. Place the figs on a large sheet of aluminum foil and drizzle honey over them. Close the foil and bake in a 350 degree oven for 15 minutes.

3. Carefully place 2 figs on each plate. Divide the goat cheese evenly among each fig, placing it in the open center. Pour the hot honey from the foil onto the figs. Serve immediately, or at room temperature.

*Variation:

Use Blue Cheese, Marscapone or Yogurt instead of Goat Cheese.


Friday, August 1, 2008

Tres Leches Cake


If you've always been told that milk does a body good but also told that cake and desserts don't, then let me introduce you to the loophole: Tres Leches Cake. Tres Leches Cake-or 3 Milks Cake-is a traditional Latin American dessert which not only packs a flavorful punch, but also helps keep your bones strong! (Take that Mom!)

It's relatively unclear as to exactly who invented this sweet, moist cake but chances are it was the Mexicans. Recipes as early as 1875 are rumored to have been started by the Mexico based Nestle Company when they placed the Tres Leches recipe on their condensed milk cans.

Regardless of who lays claim to its origin, this cake is easy and delicious, and will quickly become a family favorite.


Ingredients:

1 1/2 C. Flour

1 t. Baking Powder

1 Stick Butter (Unsalted, room temperature)

1 C. Sugar

5 Eggs

1 t. Vanilla

1 C. Milk

2/3 C. Sweetened Condensed Milk

2/3 C. Evaporated Milk

**Optional**

1/3 C. Frangelico, Brandy or Chambord

*

Method: Preheat to 350 degrees/Grease & Flour a 9x13 pan

1. In a small bowl, combine the flour and baking powder. Whisk to combine and break up clumps.

2. In a larger bowl, cream the butter and sugar until fluffy. Add the eggs and vanilla and beat until combined.

3. Add the flour in 3 batches, mixing between each addition. Pour batter into prepared pan and bake for 30-35 minutes.

4. Upon taking the cake out of the oven, use a fork or a skewer to poke 10-15 holes in the top of the cake. Allow cake to cool.

5. Combine the 3 milks and liqueur if using it. Pour over the top of the cooled cake and refrigerate for at least 2 hours. Serve chilled with sweetened whipped cream.


Ever Wonder...

What's the difference between Evaporated & Condensed Milks?


*Evaporated milk is milk that has 60% of its water removed by evaporation.


*Condensed milk is 60% milk & 40% sugar. It is cooked until most of the water is evaporated (60%) so that what remains is the sweet, thick syrup we know and love.


Saturday, July 5, 2008

Homemade Marshmallows

Ah, yes...the telltale sign that summer is truly here:

Marshmallow goo stuck to your...well, everything. While the econo-sized bag is a smart move when hoards of children are involved, nothing beats a fresh, homemade mallow.

Yes, homemade marshmallows. They really are a little piece of heaven and with not as much effort as you think, they too, can be yours.

Enjoy your marshmallows plain, sprinkled with toasted coconut or drenched in chocolate and sprinkled with graham cracker crumbs.


Homemade Marshmallows:

3 Pkgs Unflavored Gelatin (Knorr brand)
1 1/2 C. Granulated Sugar
1 C. Light Corn Syrup
1/4 t. Kosher Salt
1 T. Vanilla Extract
Confectioners' sugar, for dusting

1. Combine the gelatin and 1/2 cup of cold water in a bowl. Allow it to sit while you make the syrup.

2. Meanwhile, combine the sugar, corn syrup, salt, and 1/2 cup water in a small saucepan and cook over medium heat until the sugar dissolves. Raise the heat to high and cook until the syrup reaches 240 degrees F on a candy thermometer. Remove from the heat.

3. With a mixer on low speed, slowly pour the sugar syrup into the dissolved gelatin. Put the mixer on high speed and whip until the mixture is very thick, about 15 minutes. Add the vanilla and mix thoroughly.

4. Pour the batter into a 8 X 12-inch glass pan. Smooth the top of the mixture with damp hands. Sprinkle on any toppings. Allow marshmallows to dry uncovered at room temperature overnight.


5. Remove the marshmallows from the pan and cut into squares. Roll the sides of each piece carefully in confectioners' sugar. Store uncovered at room temperature.

*I do not roll them in confectioners' sugar. I think it makes them too sweet, but it does help the stickiness.

Sticky Photo from Wikimedia Commons. Recipe by Ina Garten.

Saturday, June 28, 2008

Easy Peasy Poke Cake

There are times when even I am too busy lazy to bake something from scratch. The recipe below was given to me years and years ago (about 10 I think) by friend and it quickly became a crowd favorite wherever I bring it. This is a recipe that any cook, at any level can be successful at...

1 Box of Yellow Cake Mix
1 Box of Strawberry Jello
1 box of Instant Vanilla Pudding
1 Pint of Blueberries
1 Pint of Strawberries


Method:
1. Prepare cake according to directions. Use a rectangular sheet pan to achieve the "flag" shape.

2. While the cake is baking, make the strawberry jello but don't put it in the fridge.

3. Once the cake has slightly cooled (about 10 minutes) use a fork to poke lots of holes in it. Pour the jello over the cake until it is all absorbed into it. Put it in the fridge until it is completely cold so that the jello can set.

4. Meanwhile, prepare the pudding (put in the fridge while you wait for the cake). Also wash and slice the strawberries, and wash the blueberries.

5. To assemble the cake, top it with the pudding and place the fruit on top so that it looks like a flag. Use the blueberries for the stars and the strawberries for the stripes.

6. Keep refrigerated until you are ready to serve-You can make this cake a day in advance but I wouldn't recommend any sooner than that.

I can't tell you how long it hold for, because there is never any left when I make it!

Saturday, June 7, 2008

Pineapple Fritters


Do yourself a favor this weekend and stop by Haymarket to get some pineapples. Dress them up with lime and cilantro for a yummy salsa for chicken or, if you feel like really spoiling yourself, fry them up and serve them warm with vanilla ice cream.

Yeah-you read it right-fried pineapple with vanilla ice cream. It's easy to make and is without a doubt a fantastic treat for anyone lucky enough to be around you. Worried about the calories? Don't be! It's fruit, right?

Ingredients:
1/2 C. Panko (Japanese bread crumbs)
1/4 C. Graham Cracker Crumbs
1/2 t. Cinnamon
8 Pineapple slices, cored
2 T. Flour
1 Egg, beaten with 1 T. water
3/4 C. Sugar
Vegetable Oil, for frying

Method:
1. Mix panko, graham cracker crumbs and cinnamon in a shallow bowl. Set up 2 other bowls-one with flour and one with the egg mixture.

2. In a deep pan, heat oil to 350 degrees.

3. Dip the pineapple slices into the flour (shake off excess) then into the egg and last, into the panko mixture. Carefully slide the pineapple slices into the oil and fry until golden brown.

4. Drain on paper towels and sprinkle with sugar. Serve warm topped with vanilla ice cream.


As seen on Bostonist.com